 YIP Note
Download
YIP Note keeps a whole case file in one place on your iPad: the documents, your marks on them, and your notes beside them. This tour walks through the main things it does, in the order you will meet them.
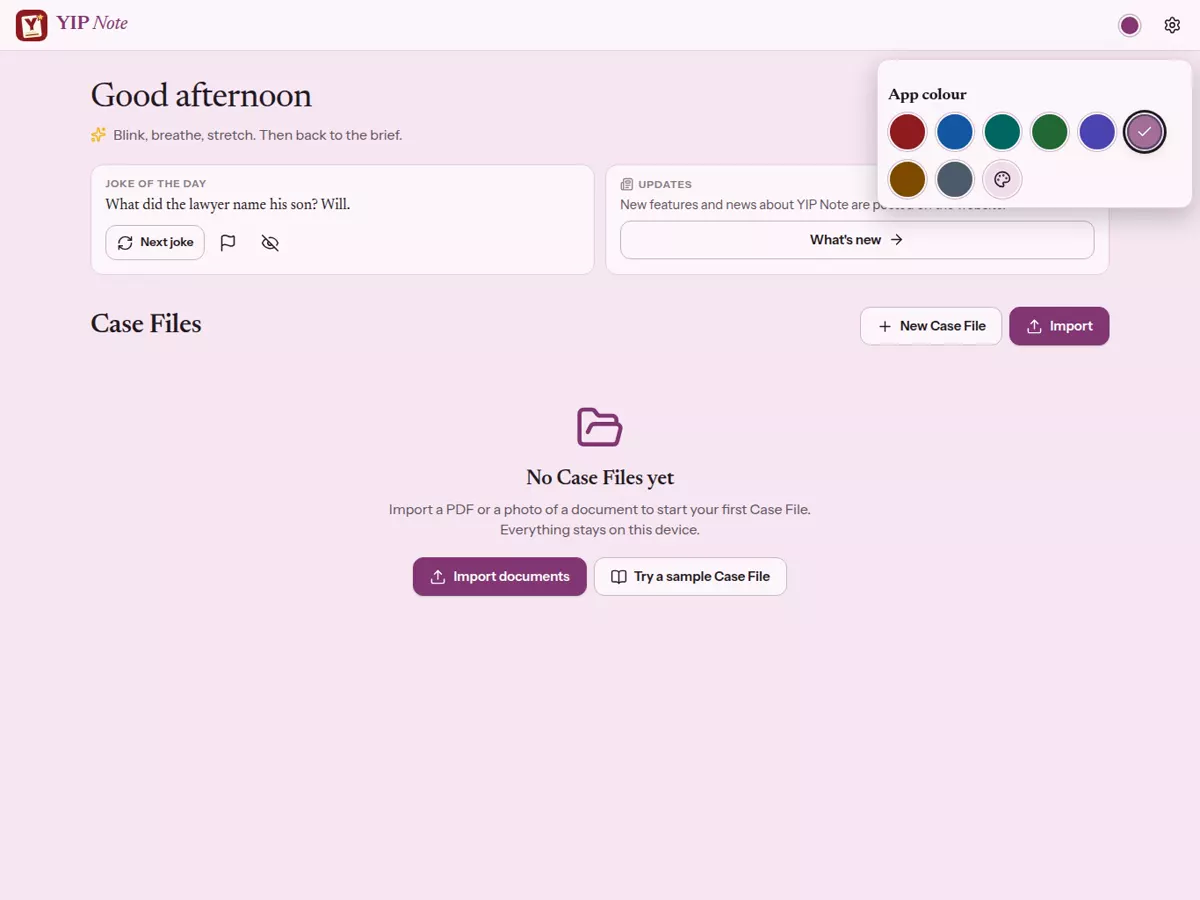
1. Pick your colour
The app starts in its own colour, Red tape. To change it, tap the small coloured dot at the top of the home screen and choose another colour. The whole app changes at once, and it remembers your choice. You can also choose Light or Dark in Settings → Appearance.
2. Import your documents
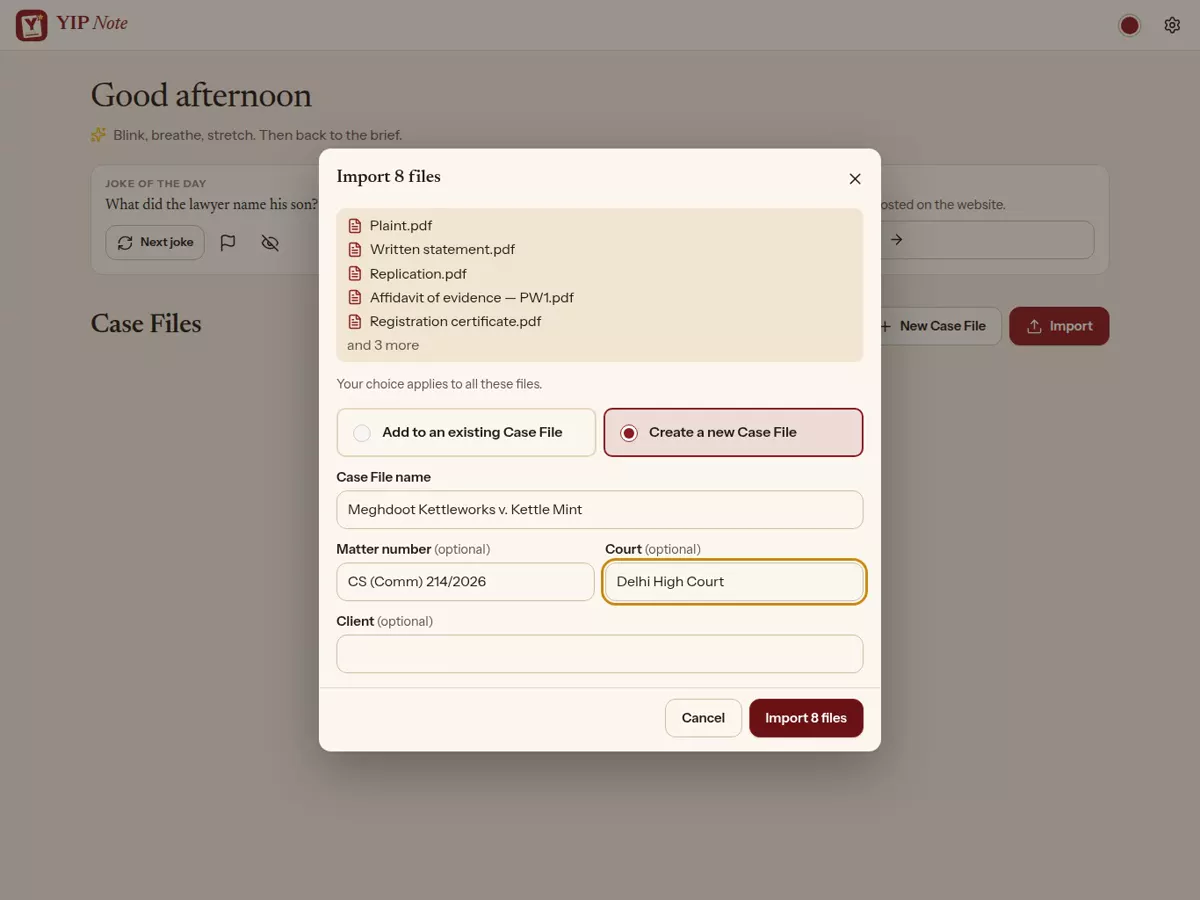
Tap Import on the home screen and choose PDFs, photos of documents or Word files (the iPad app turns Word files into PDFs, keeping the layout). Then choose where they go:
- Create a new Case File, give it a name, and if you like a matter number, court and client.
- Or Add to an existing Case File.
You can also open a PDF in YIP Note straight from the Files app or from an email.
3. Open a Case File
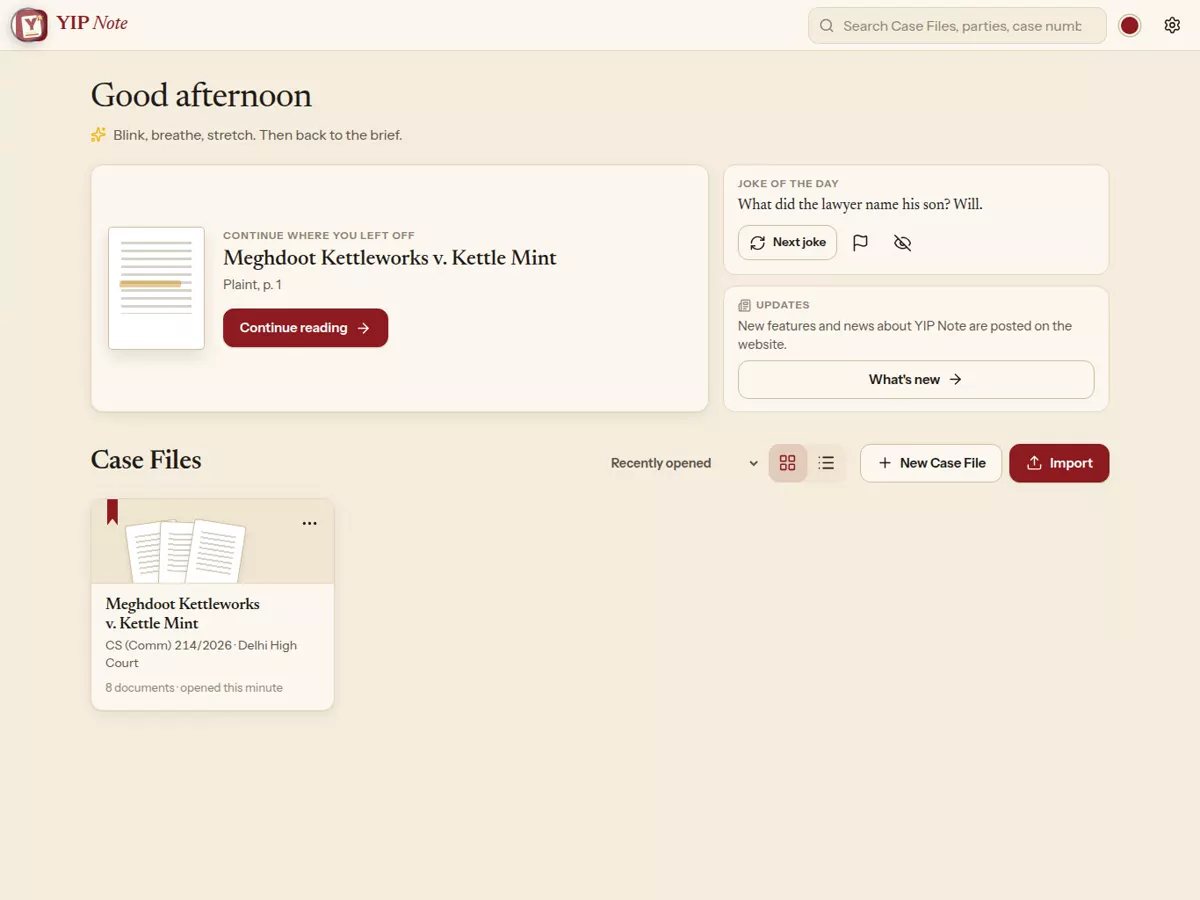
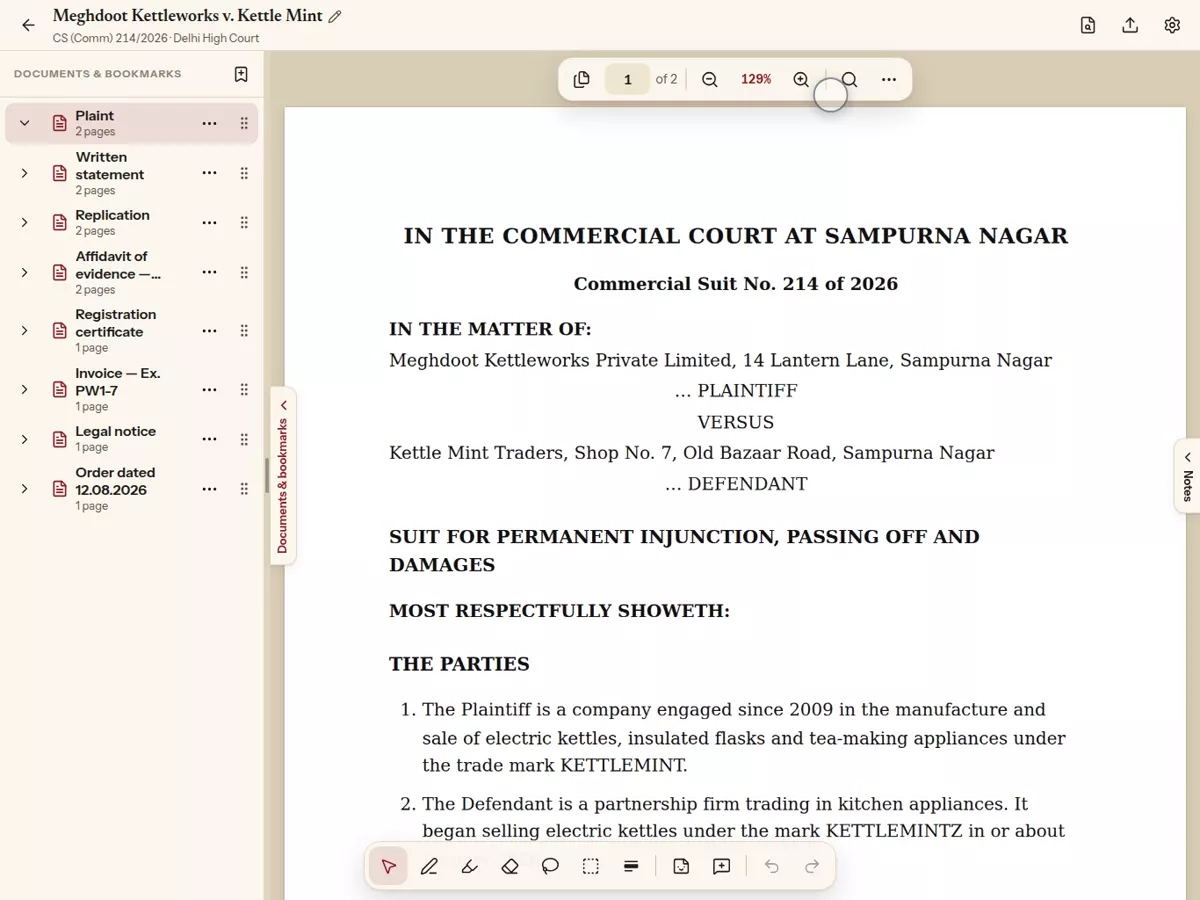
Your Case Files are on the home screen, most recently opened first. Tap one to open it. The document is in the middle. On its left is Documents & bookmarks, and on its right your Notes. Tap the buttons at the edges of the screen to open or close each side.
4. Move around a document
- Scroll with a finger, and pinch to zoom.
- Tap the page number at the top, type a page, for example 233, and press Go.
- Page thumbnails show every page in a column.
- Search in this document finds a word and takes you to each place it appears.
5. Bookmarks
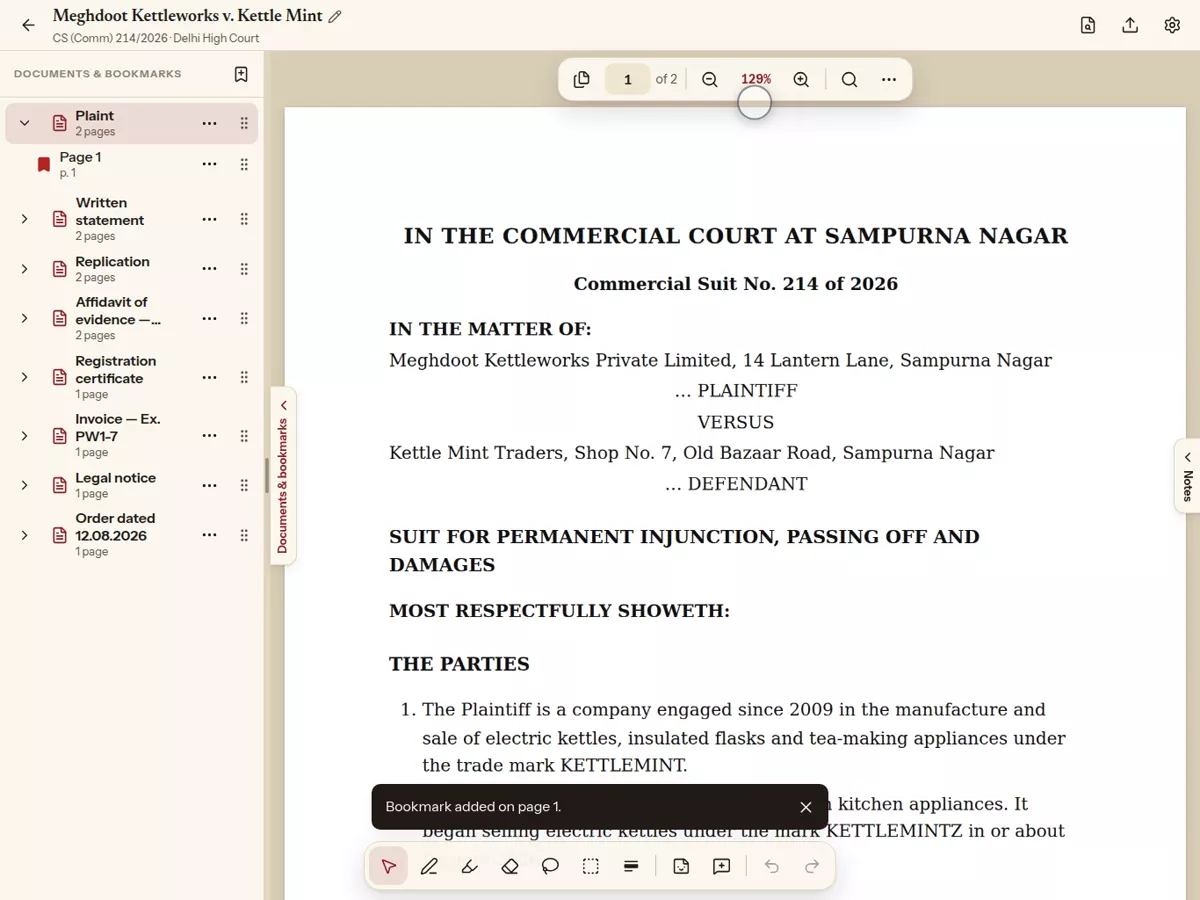
Tap Bookmark this page in the reader's top bar. The bookmark appears under the document in Documents & bookmarks. Tap it to go back to that page any time. You can rename it, give it a colour, or drag it to reorder.
6. Mark the pages
The pencil case at the side of the screen holds your tools:
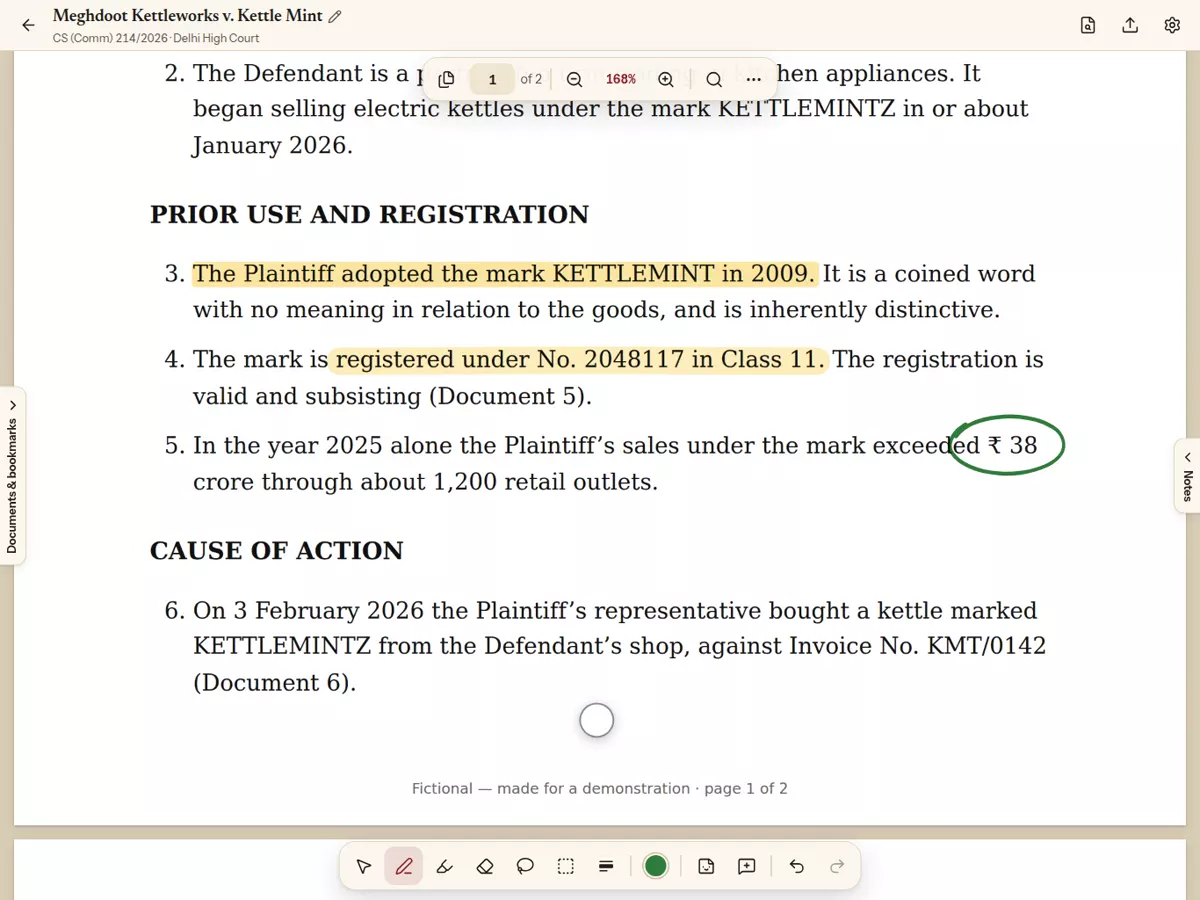
- Pen to write and underline in your own hand.
- Highlighter. The colour goes behind the words, so they stay easy to read, and it snaps neatly to the lines of text.
- Eraser removes only your own marks, never the document.
- Lasso selects ink to move it or change its colour.
- Clip to notes. Draw a box around a table, figure or signature, and a picture of it goes into your notes.
- Redact draws a solid black box over anything.
To change a tool's colour and thickness, tap the colour circle next to the tools. You can try colours one after another, and the panel closes when you tap outside it. Write with the Apple Pencil, and your fingers will still scroll and zoom. Every mark can be undone, and everything is saved as you go: there is no Save button.
To mark words exactly, use Select. Press on a word, drag across the text, and choose a highlight colour, Underline, Strike-through, Add to notes, Comment, Redact or Copy text.
7. Notes that point back to the page
The Notes side is a board for this Case File. Double-tap it to write a note. Selected text and clipped pictures arrive as clippings with their citation (document and page). Tap one to jump back to that exact place in the document.
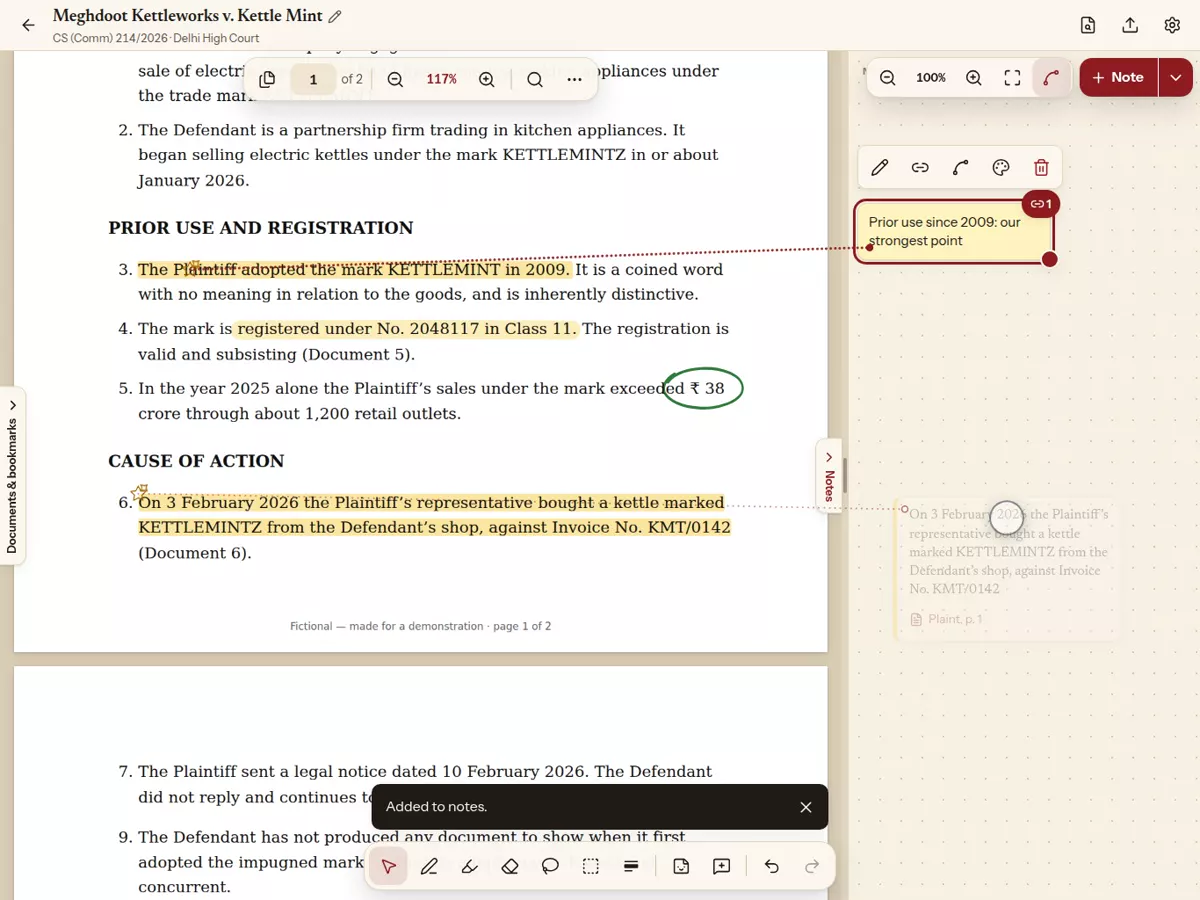
To connect a note to any part of any document, drag the note onto the document, or draw a line with the Pencil from the document to the note. A small star marks the place on the page. Tap the star to open the note, and tap the note to go back to the place. Notes can be grouped, folded away and joined to each other. + Note starts a fresh notes page when one gets full.
8. Keep a backup
In Settings → Backups, save all your Case Files as one .yipnote file to keep somewhere safe or to move to a new iPad. Restoring a backup adds its Case Files and changes nothing you already have.
If you are stuck, the Help page answers common questions, or write to us. We read every message.